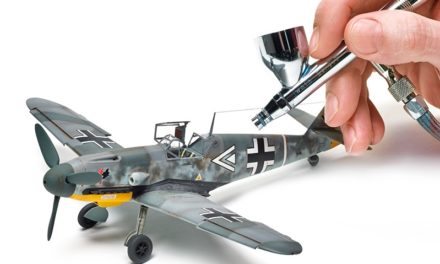
Priming is a crucial step in miniature painting as it lays down the foundation for all your work. Whether you choose to prime with black or white, each has its advantages and considerations. Let’s explore the benefits and techniques associated with each.
Priming Black
The Advantages of Black Primer
Priming your miniatures with black paint offers several advantages, particularly if you frequently work on multiple or swarm armies. Black primer facilitates speedy and clean painting, providing valuable shortcuts in the process. Many painters swear by Citadel’s Chaos Black primer for these purposes. Despite its relatively higher cost (around 8 bucks a can), it is favored for its consistent high opacity, good coverage, and thin application.
Temperature and Storage
To achieve the best results with black primer, temperature management is paramount. Always store your primer cans at a constant warm temperature. Ideally, keep them indoors at room temperature. Avoid storing them in the garage or shed if possible. If circumstances demand storage in such places, plan to bring your cans inside at least an hour before spraying.
Proper Mixing and Application
Proper mixing is another crucial aspect of priming. Shake the can vigorously for at least two minutes before use. Start by swirling the agitator around the bottom to re-mix settled components, then shake conventionally. When it comes to application, avoid spraying for longer than 15 to 20 seconds at a time, as prolonged spraying can affect the can’s temperature. Additionally, maintain a relatively close distance to your figures and utilize quick bursts to minimize overspray and temperature fluctuations.
Practice and Personalization
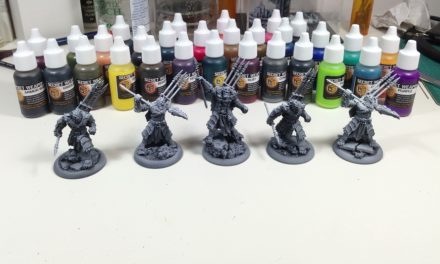
Priming is an art that relies heavily on practice and personal preference. If you’re new to priming or wish to experiment, consider purchasing a batch of inexpensive metal miniatures for testing different primers and color schemes. Remember that the goal is to create a solid foundation for your painting endeavors.
Priming White
The Appeal of White Primer
White primer offers a blank canvas for your painting, allowing colors to appear vibrant and true. When selecting a white primer, two standout brands are often recommended: Krylon white primer and Dupli-Color automotive primer. These options are known for their excellent coverage and smooth application, making them ideal for miniature painting.
Prepping Your Miniatures
Before priming, it’s crucial to prepare your miniatures adequately. Even the most meticulously crafted miniatures can carry a light residue of release agent from the casting process or your own natural oils from handling. To address this, give your miniatures a thorough wash with hot water, dish soap, and an old toothbrush. Hot water is ideal for breaking up grease, and it also accelerates the drying process. Ensuring that your miniatures are completely dry is essential, as any lingering moisture can hinder primer adhesion. Air drying is preferable to using a cloth, as it eliminates the risk of lint from the cloth contaminating the primer. If towel drying is necessary, opt for lint-free cloth available at hardware stores.
Weather Considerations
Weather conditions play a significant role in the priming process. Check the temperature and humidity parameters specified on your primer cans, as these may vary between brands. Generally, priming is best done in temperatures ranging from 55°F to 90°F with low humidity. Avoid priming on wet surfaces, such as pavements or concrete. A simple rule of thumb: if it’s wet outside, refrain from priming; if it’s dry, you’re likely good to go.
Additional Tools and Techniques
Enhance your priming experience with a few handy tools. A spray can trigger attachment can provide better control and comfort during the spraying process. Additionally, consider using a latex glove for the hand holding the miniature to prevent grease transfer and maintain skin health.
Applying White Primer
Priming is all about getting the primer from the can to your miniature without any mishaps. Ensure that you shake the can vigorously for approximately two minutes, especially when using a new can. Adequate lighting is crucial for identifying any missed spots while spraying. Aim to spray from a distance of six to ten inches, employing smooth, even strokes to achieve a seamless surface finish. Opt for two light coats over one heavy coat to preserve intricate miniature details. After priming, allow your miniatures to sit for a minimum of two hours before painting, though 24 hours is the recommended timeframe for the primer to fully cure into a hard surface.
Personalization and Practice
Ultimately, the choice between black and white primer hinges on personal preference and experimentation. Both have their merits, and your painting style will dictate your preference over time. As you gain experience, you’ll develop your unique techniques and nuances.
Happy painting!