If you have already read some of our other guides you should at least know vaguely what dipping is. It has been around for a while, quite a while, though many are still unaware of dipping as a speed painting technique, and not everyone seems to know much about it.
It is generally relegated to a quick and easy method, usually best suited for simple grunt models. In the past, I have attempted the method on a couple of minis but after months of toiling through white Retribution Of Scyrah armor I gave up and have moved on to Dipping.
What is Dipping? Dipping is a ‘painting’ method where you dip base-coated minis in a wood stain-type substance, sealing the mini and adding shade tones.
I’m sure other people out there do things differently, but what follows is how I dip my minis.
What Do You Need To Dip Your Minis?
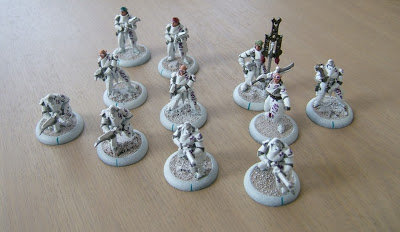
Well, firstly you need some minis, and you need them to be painted already. Without them this is all sort of pointless. I’ll be using Invictors, as the unit has already been shown the way by squad-mate Invictor#1.
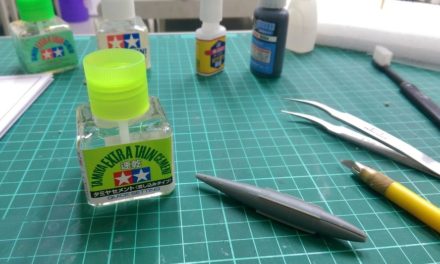
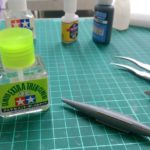
Then you need something to dip them in. I’ve said this elsewhere, but I’ll repeat it for completion… I’m using a WATTYL Colourwood All In One (Walnut) wood stain; I don’t know if it’s available outside of New Zealand, but in my experience it’s pretty good.
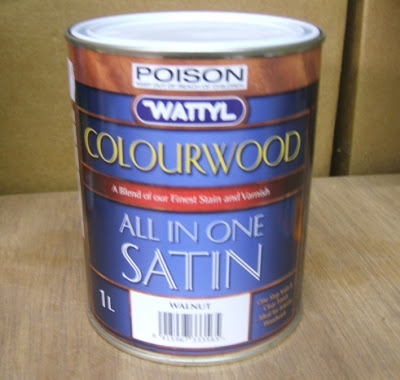
There are a lot of other brands out there, specifically Army Painter, Army Washes; and while I haven’t tried them, they strike me as a more money for less product. Which is an issue as smaller tins will be harder to dip larger minis (jacks) in. I also think, with a proper painting company I stand a better chance of being able to use the same color dip over the years.
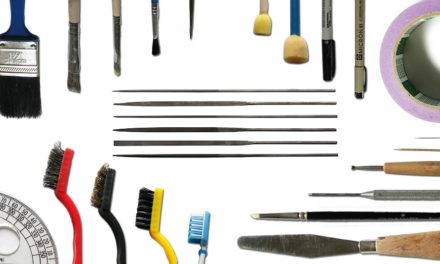
But don’t forget the little extras. You’ll want: a screw driver to open the tin of dip, some old newspaper to protect your table, old paint brushes to deal with excess dip, paper towels, and some turpentine or something to help clean your brushes, etc.
Note: Some people might also like to use gloves (to protect their hands), but I find the loss of feeling/accuracy to be far too costly, especially in dealing with sticky product like dip.
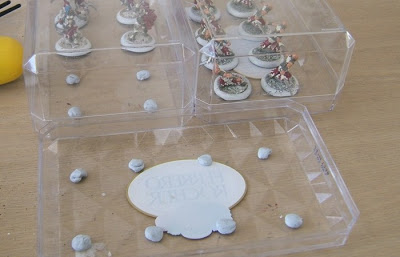
As an extra, I use old container to hold my minis while they dry – the dip can take a while to dry, and this stops dust falling on them, etc.
On to the step-by-step…
Dipping Minis: Step-By-Step
Following each step below you will pick up the process in no time and have a speedier time completing your miniature projects.
1. PAINT SOMETHING AND GET EVERYTHING TOGETHER
That’s right, step one is that simple.
Note however, that since dipping is a basic total mini shading technique you really need to take a bit of extra time painting the mini in its base colours – making sure you pick out all the basic details and get your edges crisp. The end result will be that much better for the little extra time spent.
2. DIP THE MINI
Grab the mini and dip it in.
Some people glue or stick the mini to a piece of wood or some such, but in general that seems like a lot of unnecessary hassle. I just grab the base (holding it tight with my finger nails) and dipping it right in. You don’t need to leave it submerged; but don’t rush in putting it in/out, and make sure the mini has been properly covered – one of the benefits of not wearing gloves is you can tell pretty easily when the mini is fully submerged in the dip; you also don’t have to worry about glue bonds breaking and the mini falling in.
3. LET THE DIP RUN OFF
You should hold the mini above the dip for a few seconds to let any super-excess dip run off. Once you have reached this stage it becomes pretty clear how quick and easy getting a coat of dip is; but also how important it will be to check the dip doesn’t pool too much anywhere.
I find a good method for encouraging the excess dip to run of the model and back into the tin is to blow gently but firmly on the mini.
4. CLEAR OFF EXCESS DIP
This is where things get a bit time consuming.
You don’t want to leave the mini upside down for too long, lest all the dip run to the models head and dry leaving it darker on the top then the bottom.
Progressing from here, a lot of people shake the mini or even attach it to a power drill (remember some people attach the base to wood or some such prior to dipping) and spin the model. This is great for clearing off excess dip, but doesn’t control where the dip pools, and in my experience can be quite messy – after all, you’re flinging the dip everywhere.
Instead, once the dip stops running off the model (as in step 3) I:
A. Wipe away excess dip around base.
This requires two hands, so I couldn’t take a picture. But, after dipping the mini, the base and trim usually have a bit of excess dip on them and when you flip the mini upside down it will just pool there. So I sit the base in a paper towel and wipe around the trim, clearing off any excess, and if it has seriously pooled on the top of the base I try to soak that up with a paper towel too.
Note: For certain models the paper towel can also be handy for absorbing and ‘pulling off’ big ‘drips’ of dip pooling on the mini (on weapon tips, under arms, etc).
B. blow and/or whip up excess dip.
With the base clear you can then handle the mini easily and deal with the dip sort of like paint. I generally blow down the model to encourage the dip to flow down (shading the bottom rather than the top). This deals with most of the pooling.
If the dip pools strongly, or starts covering the base again I use an old paint brush (small ones are good, but a big one is handy for large surfaces like the base). With a brush you can gently whip up excess dip pooling in between surfaces.
Slightly harder to deal with is minor pooling. This is where the dip pools on a flat surface, instead of between two surfaces, or in ‘cracks’. Generally this sort of pooling is what adds shading to the mini, but there are two issues that can occur with this type of pooling. Firstly it might stop a surface being coated properly, something that will create seams in the finish – lines the dip has pooled along, but not over a corner/side on the mini. Secondly if it is inappropriately placed minor pooling, then whipping it up might remove too much dip from the surface, leave bare patches.
To deal with these I find it easiest to paint on some additional dip – covering any bare areas (in seaming), and lightly whip the dip up the mini to the effected patch. This gives a flowing path of dip for any excess to flow down to, and helps encourage an even coat. I also find it useful to blow gentle on the mini, encouraging the dip to flow and smooth out any roughness in the drying dip caused by the brush.
5. LET SETTLE FOR A MINUTE
Once you’ve got rid of the excess dip and smoothed the coat, put the mini down and move on to another one. This will let the dip settle on the model for a little while.
6. CHECK BACK LATER
Giving the dip time to settle and then rechecking for excess is important. About half an hour to an hour later any hidden excess dip will have had enough chance to pool – quite an issue on some models. This is generally most noticeable on the bases around the feet, and at the tip of down pointing weapons.
At this point the dip still won’t be touch dry, but will be hardening, so it’s a last chance to whip up any of this excess dip.
7. LEAVE TO DRY
This is self explanatory. Once you’ve dipped the model, leave it to dry. I generally leave my dipped minis covered for a few hours after dipping, and then at night I uncover them. Keeping them covered protects them from dust, but also seems to slow the drying time.
It takes about a day (12hrs uncovered, 36 hours covered) for the dip to get (touch) dry; but given the nature of the dip it’s best to try leave the minis alone for another day or two if you can.
8. AND…
With any luck it will have all gone to plan, then everything should come out sweet. If there’s any patches where the dip hasn’t seemed to coat well enough then you can always apply some extra with a paint brush.
In either case, your minis should hopefully come out looking…
AWESOME!
So that’s my Invictors dipped. Now I’ve just got to finish their bases and get them matt varnished (to remove the shine), etc.
Done
So that’s my guide to dipping.
I hope it has proves useful to anyone interested in the painting method. As my whole Retribution army is being done in this method I don’t expect to put up any other real painting guides on here, but if I paint something nifty for another faction you never know… it might find it’s way over here.